February 24, 2023
In
Techniques, Tips for Beginners
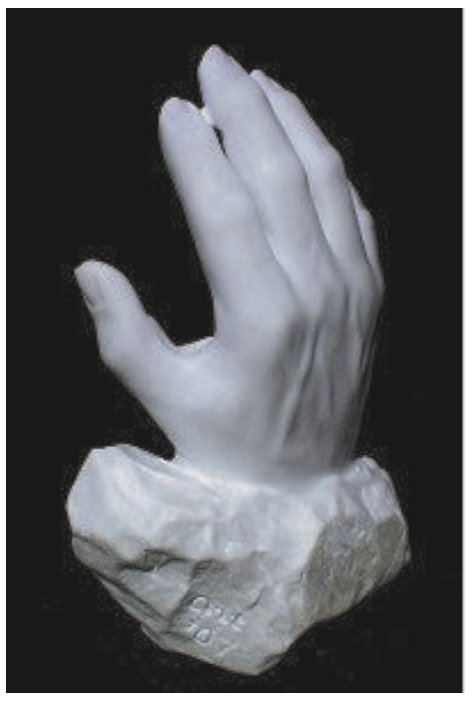
Hands Down
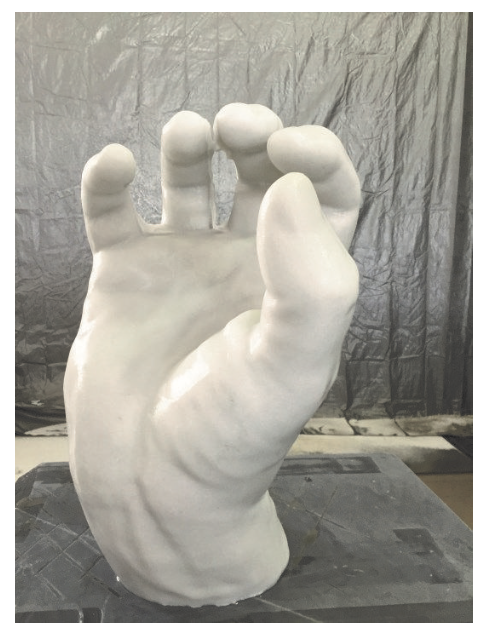
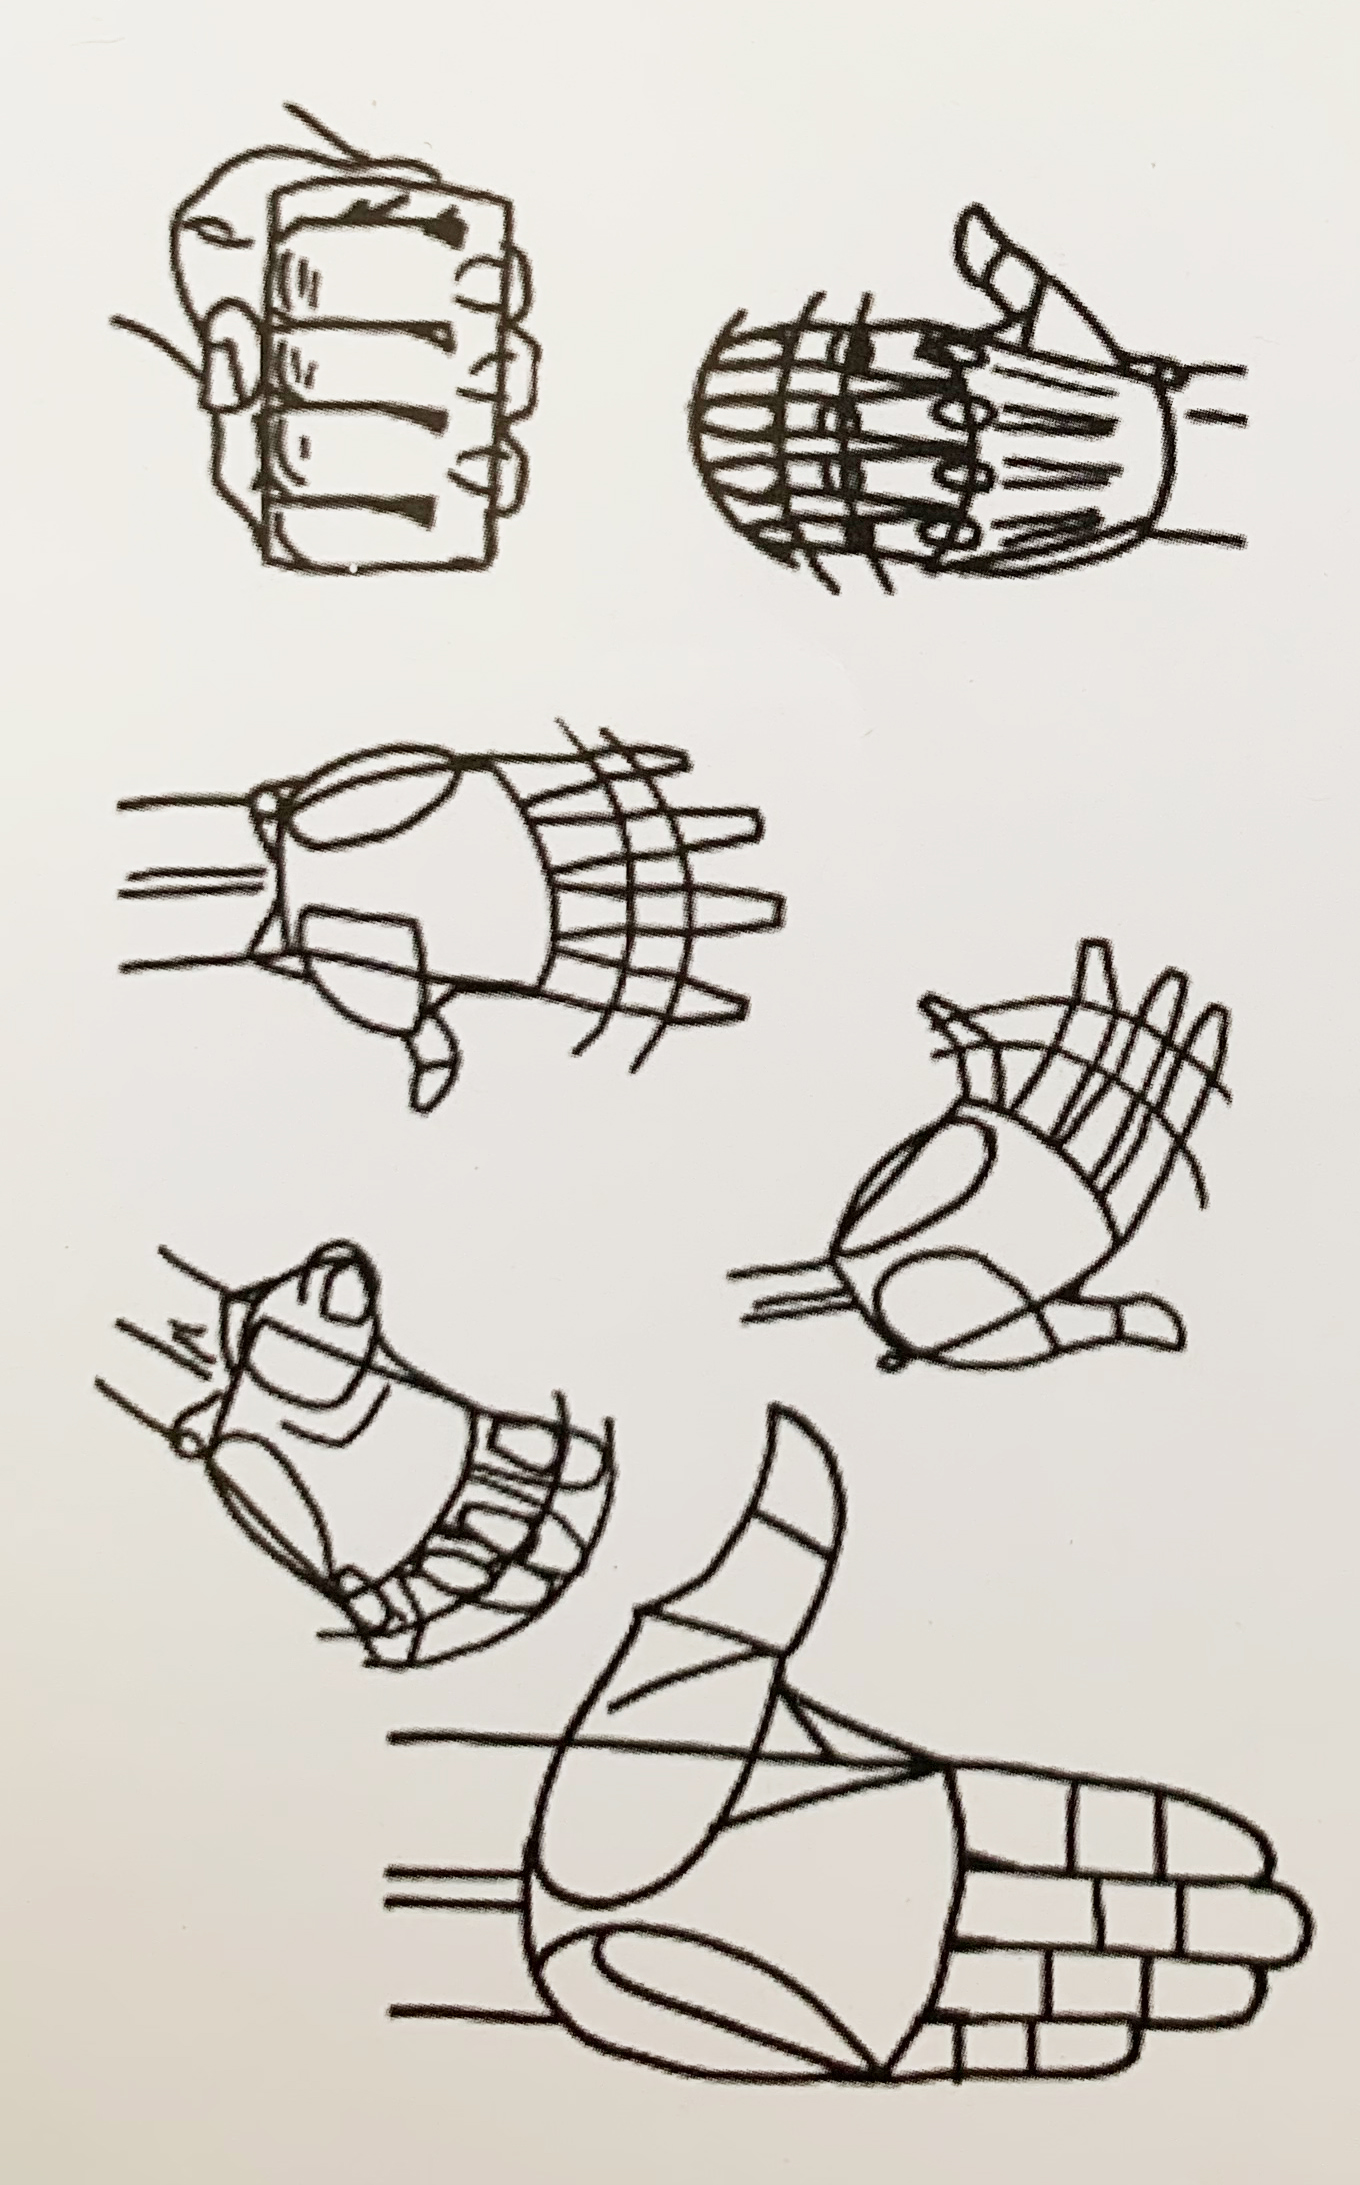
Visual references for hand proportions
Marble hands by
Patrick Doratti, Ted Fleming, and Art Wells
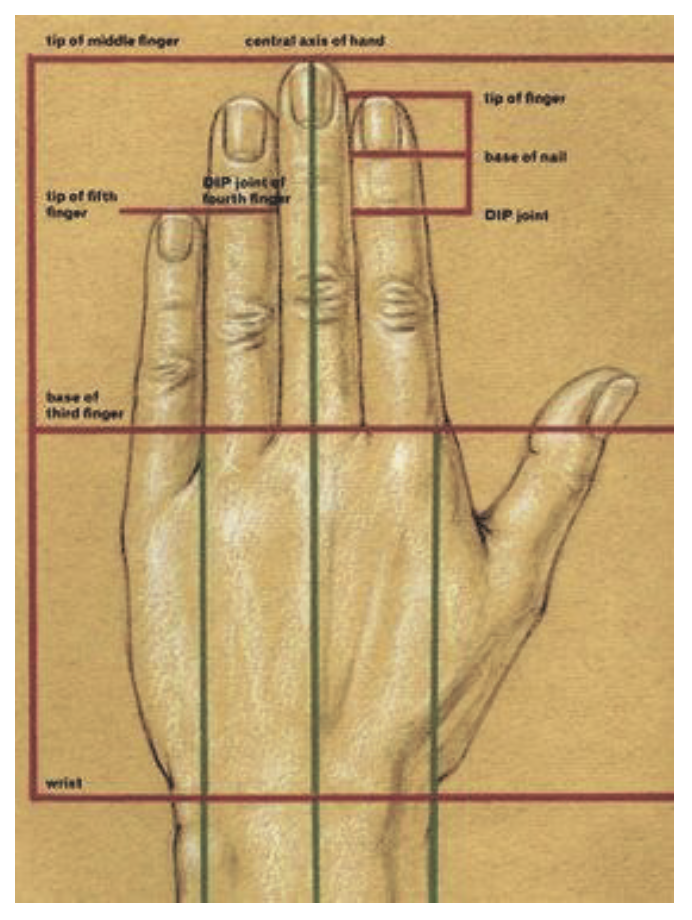
Visual references for hand proportions
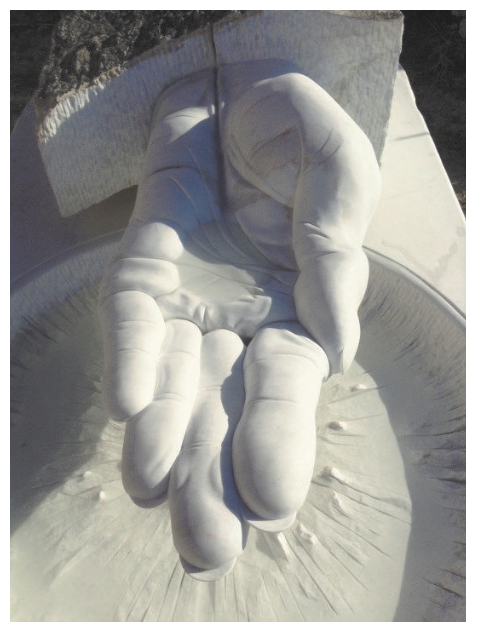
Marble hands by
Patrick Doratti, Ted Fleming, and Art Wells
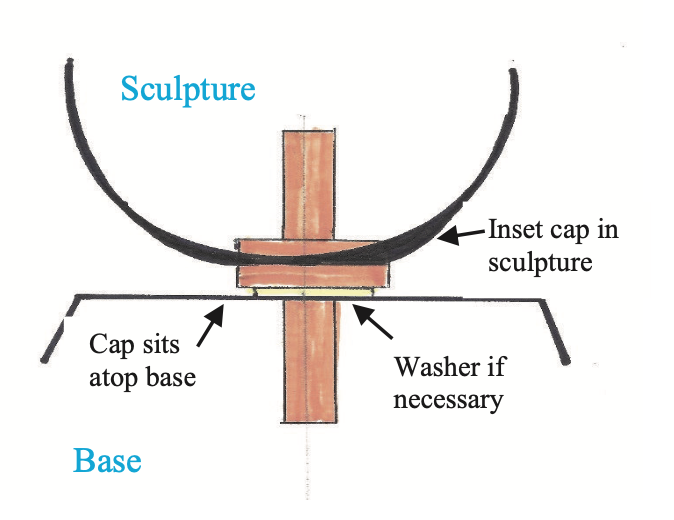
Bases are the frames for sculptures. To mount stone to a base you must use a pin to connect them (just glue will break apart). This should be a stainless steel rod so it won’t rust or a brass turning pin.
To mount a turning pin drill the two holes: base and sculpture.
Grind a little of the hole in the sculpture so the “cap” is level with the bottom. Let the cap sit on top of the base. This provides some separation for turning. Test before gluing with epoxy. If the sculpture still rubs on the base when rotated, you can put a brass washer over the base hole to raise it up.
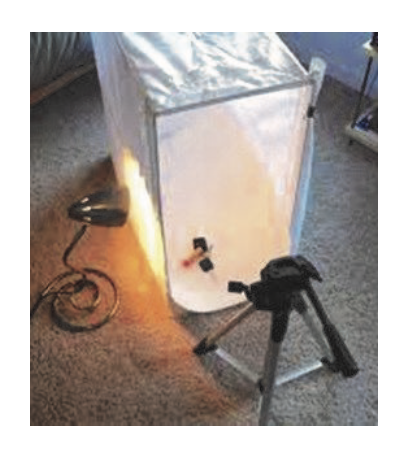
To create a professional portfolio or to impress friends, it is important to have a clear picture of your work.
All the stones sold from 2sculpt are safe to carve. That means no asbestos, arsenic, radioactivity, or trans-fats. Still, you should always wear personal protective equipment (PPE), namely a paper mask and safety glasses.
If you are using power tools and therefore creating a lot of dust you need ear protection and should have on a respirator.
Whereas a paper mask catches about 40% of the dust, a double respirator labeled as P100 will provide about 99% protection. Gel bicycle gloves without the fingers are my favorite for vibration.

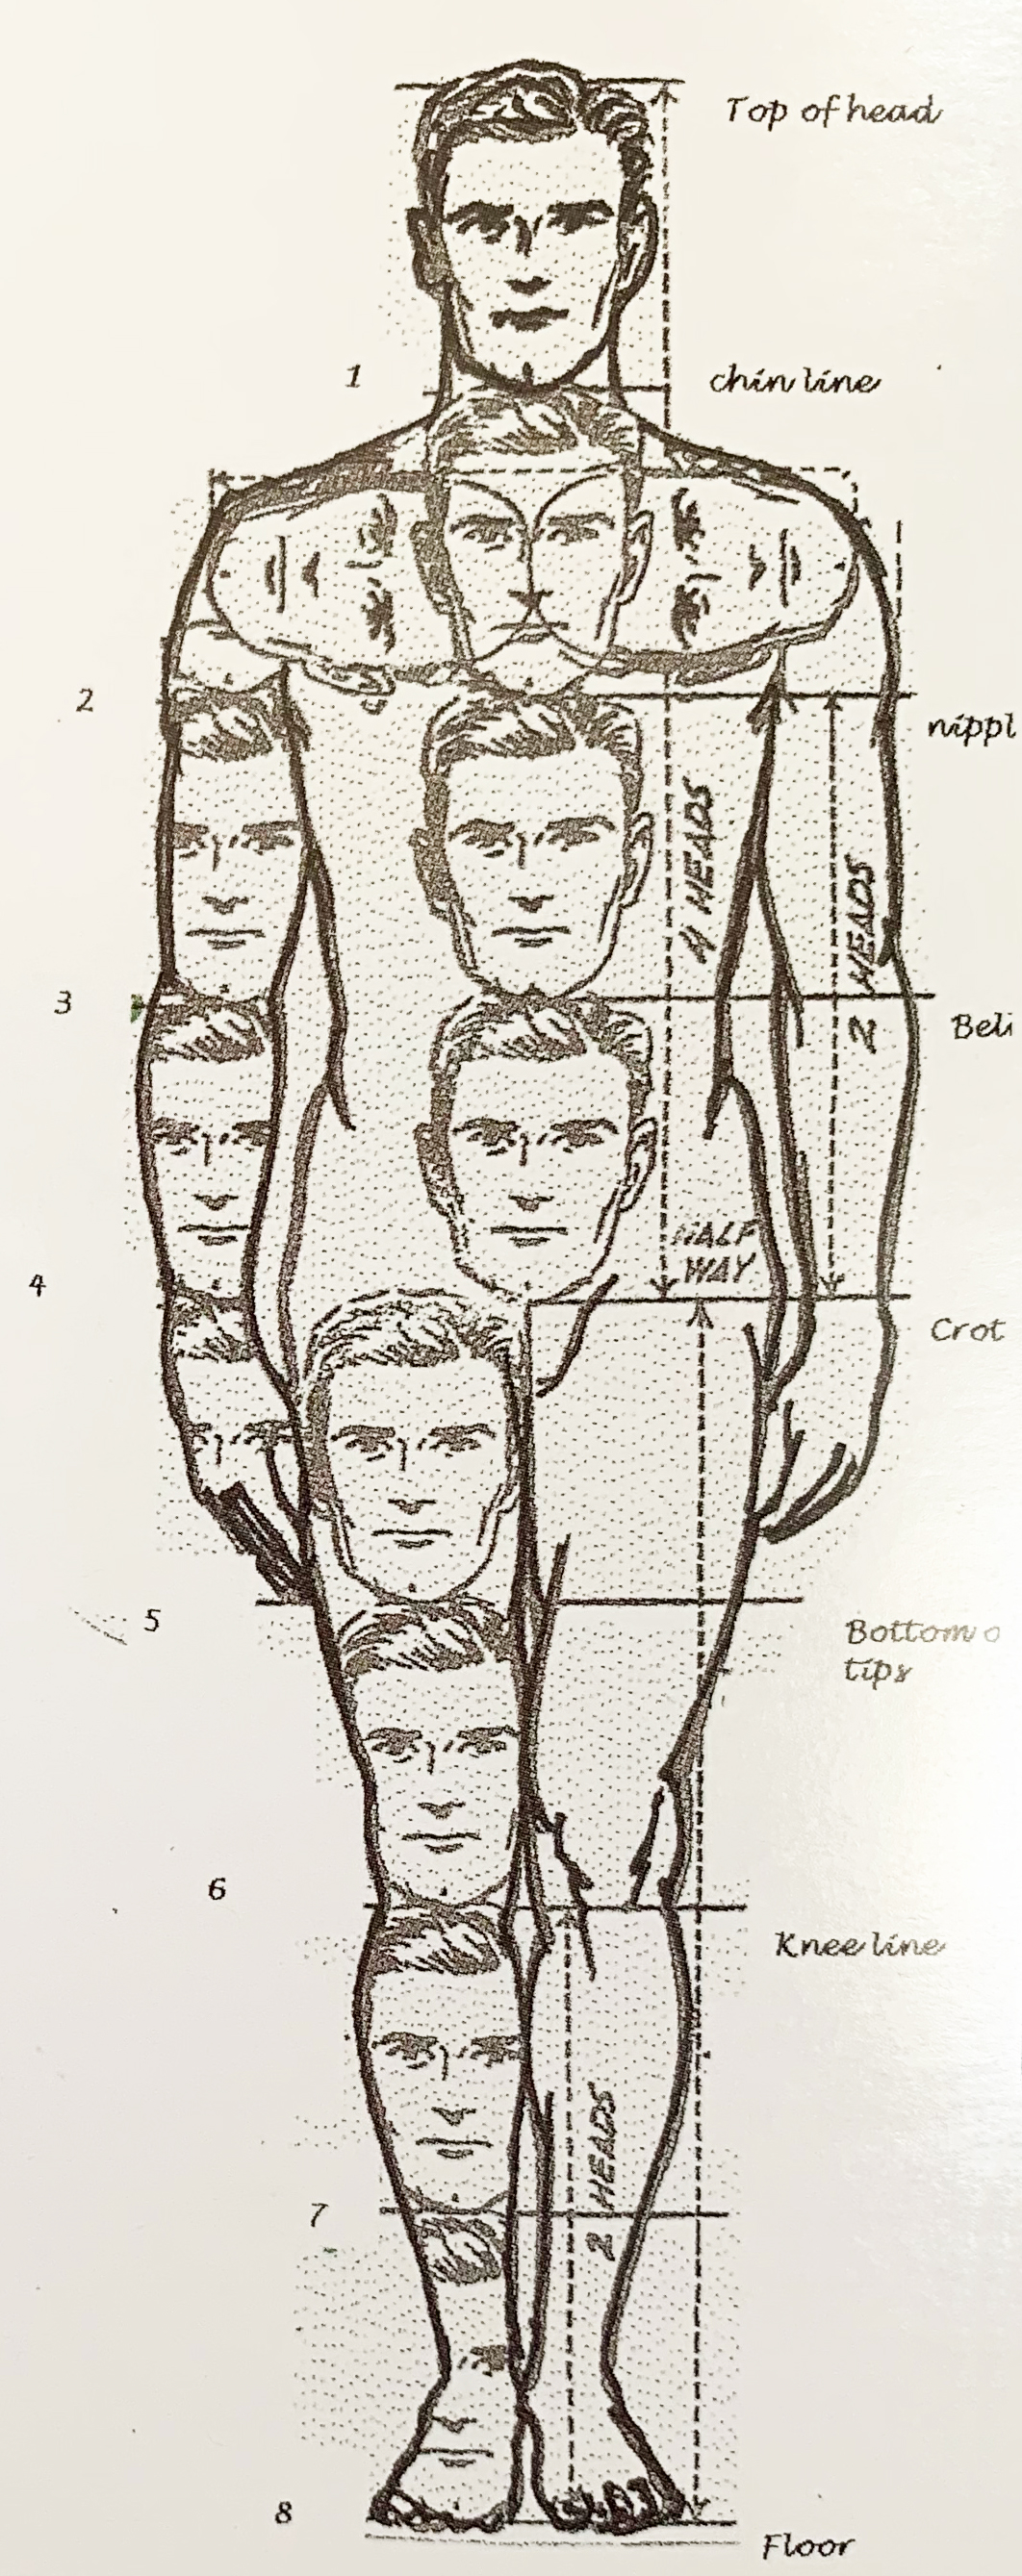
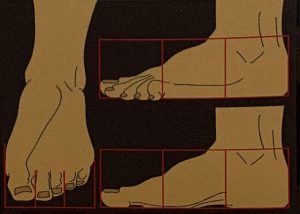
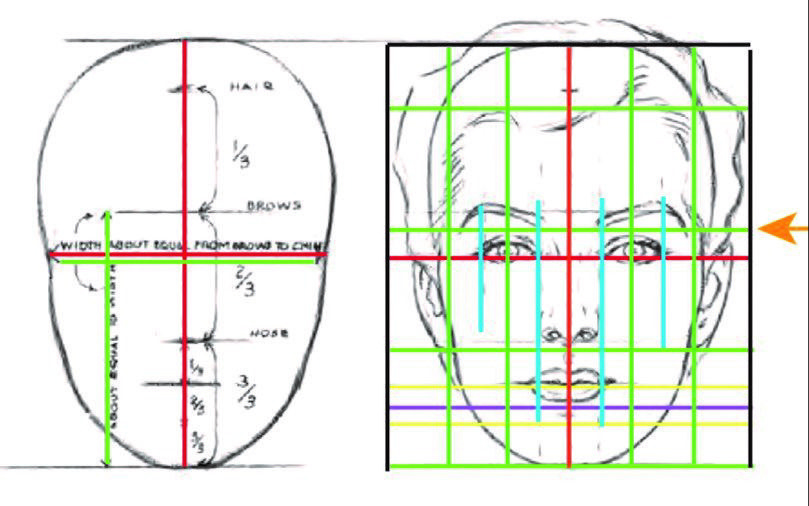
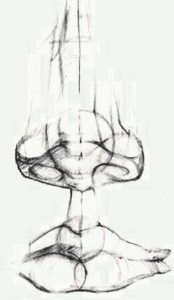
Useful diagrams for sculpting the human form.
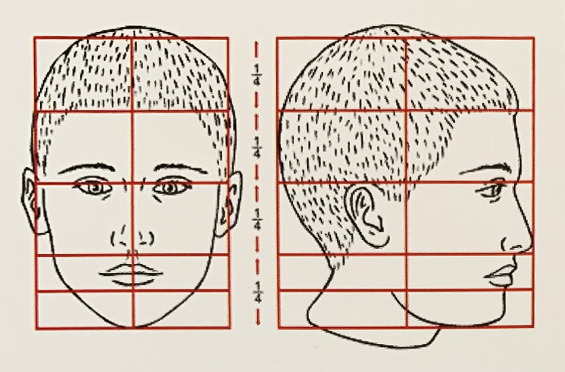
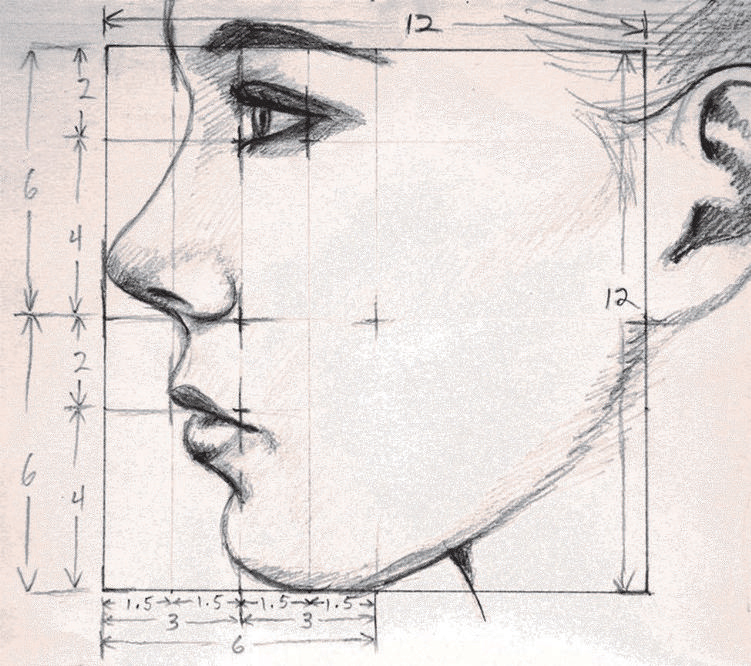

Useful diagrams for sculpting the human head
Head Proportions (very generalized): 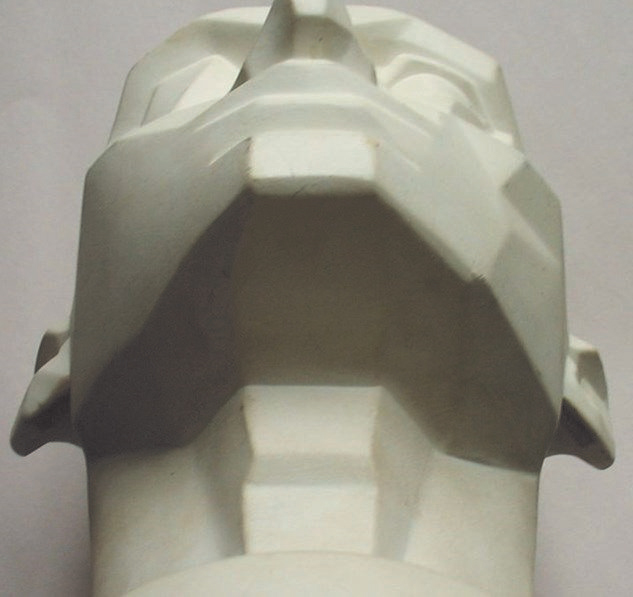
1. Distance between eyes is an eye width
2. The width of the nose is about one eye.
3. The eyes are at the vertical center.
4. The ears go from nose to eyebrows.
5. The neck slants back and has muscles.
6. The mouth is barrel-shaped– rounded.
7. The mouth is 1/3 from nose to chin.
8. The neck is about half the head width.
9. Since the head is “V” shaped from the nose to the ears, the corner of a stone
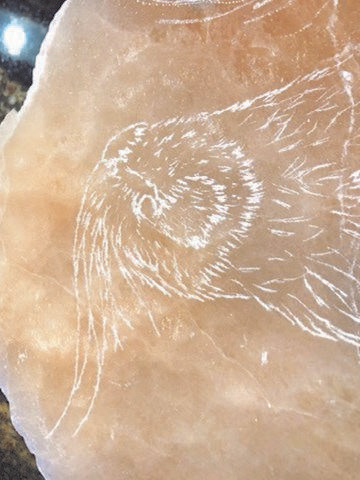
Mark Donadio showed me how he etched a picture onto stone. He uses hobbiest Mod Podge to glue a picture to a flat stone. After it dries thoroughly he can rub the paper away with a sponge. The picture is then on the surface. He then uses a Dremel with a pointed bit to etch the picture after which he can clean the transferred image off. I imagine this would be a good way of doing a bas relief with chisels, as well.
You can change the color of clear alabaster. This technique has been perfected in Italy. However, the dye is toxic and should not be flushed down the drain. If you want to experiment get the wood dye called ANILINE. Warm water to room temperature (20C/68F). Add Aniline dye to a ratio of 30% color to 70% water. Soak the stone for 10 hours. Wash it off.
I use the first two or three grits of sandpaper dry and the rest wet.
I wash off the stone between grits and allow it to dry for inspection before continuing. Use an old sheet of 1000-grit sandpaper for a few minutes between grits to bring out missed scratches.
Half your sanding time is on the first grit—getting out those deep scratches. Then the next grit might be 1/4 your time and so on. The last grit is a “breeze.”
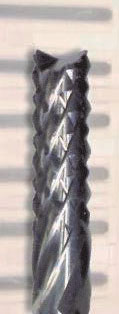
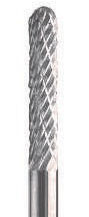
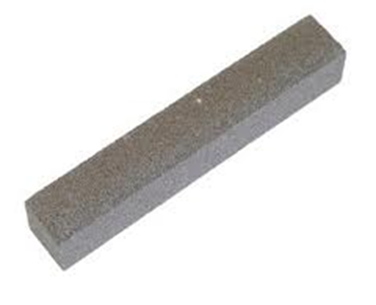
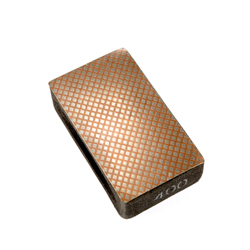
Wanna get the finest detail? Try small carbide burrs. These are double cut steel burrs in 1/32” to 1/8” sizes for Dremel machines. With a steady hand you can get the most minute hairs or textures. The three basic types are rounded, fishtail (“V” on the edge”) and flame. I found the Dremel 3000 was not that expensive and very steady. The cheaper ones wobble. (We have the burrs individually or in a kit.)
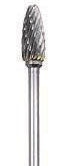
^Not actual size; much smaller

^Not actual size; much larger
by Al Brown, master of detail
There are several ways to enlarge or “point up” from a model. It is best to use an even increment of enlargement (2x, 3x, etc.) to make the math easier.
(1) Use calipers and a ruler to transfer dimensions.
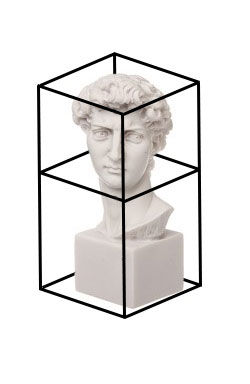
(2) Build a wire box around the model and use it to measure depths from the outside of the stone to the final surface.
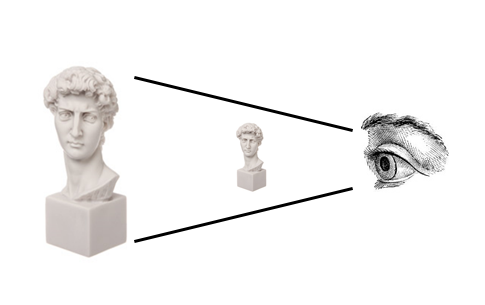
(3) “Superimpose” your model over the stone by holding it a distance away until it “appears” the same size. Then you can mark on the workpiece where different things should be.
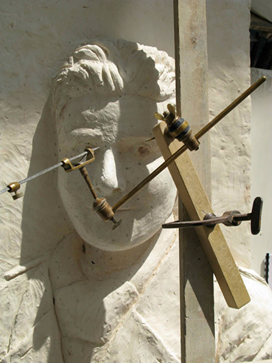
(4) Use a “pointing machine” which is an adjustable frame that can be moved back and forth between the model and the stone, drilling holes for approximate depths. See this for an example of pointing:
To laminate properly the surfaces must be very flat to avoid gaps. For large stones, we used power equipment, in particular, a Blackcat which is a diamond grinding wheel on an angle grinder. It still required laying a steel flat edge over the surface repeatedly to find the high spots, mark them, and grind again. Eventually, the surfaces matched and we were able to drill holes for stainless pins and epoxy them together. The pins are necessary as stones can separate, not on the epoxy line but on the next layer of crystals.
On a smaller scale, you can use a concrete block with some sand on it and rub the stone on it. This goes fast with softer stones but does take patience with marble. All the high spots are ground down for a very flat surface before gluing.
Lastly, if the carving is substantially done you might consider slightly “hollowing out” the middle of the stone. Then you will only have to flatten the outside “rim” of the stone. For a base to be flat I might remove just ¼” of the center of the bottom.
“Rouge” literally means red. Not so in the polishing business: it means fine abrasive. After sanding up to 600 (higher on darker stones) you may still want that deeper color and shine. “Rouge” may be the answer.
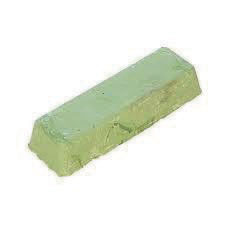
 This is a block or stick in white, black, or green for light very dark, and green/gray stones. Use a muslin wheel on a drill or die grinder to pick up some of the rouges. Then rub it on the stone in a small area: Pop – a colorful shiny finish.
Tin Oxide powder is mixed with water to create a rubbing paste for a very high sheen (without toxic oxalic acid).
Sand, sand, sand. The more scratches removed the deeper the color and the more gloss. If you “finish” sanding and then wet the stone it might look much better. You can continue sanding to get more scratches out or apply a coat of color enhancer. The silicon in the enhancer seals those micro-scratches. Wax is a nice top coat for protection and a smooth feel. Buff the wax by hand or with a tool to heat the wax into the stone. Black wax enhances very dark stones. Outdoor sculptures can be left alone or protected with a breathable sealer like Limestone & Marble Protector. Water must be able to leave the surface.
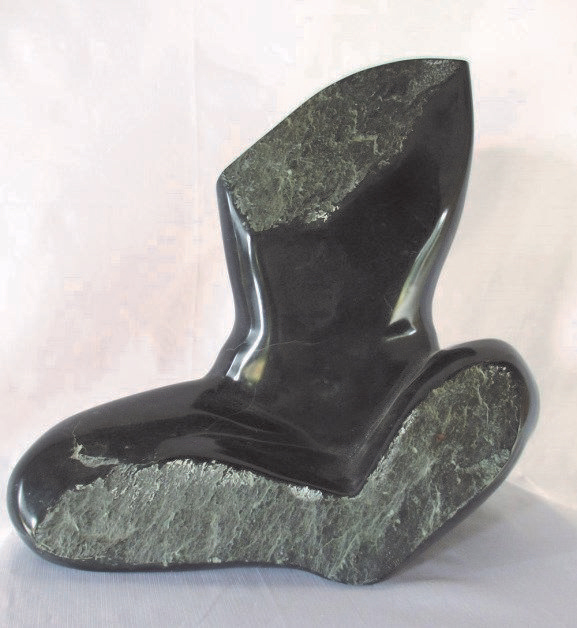
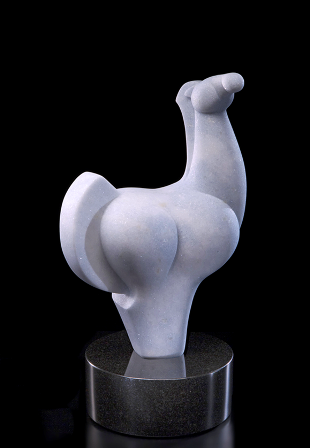
Belgium Black Marble by Caro Pemberton
There is no “magic wand” to finishing a stone sculpture. It is just plain patience and work. The critical work takes place in the beginning – getting the worst scratches out. The steps are: flat chisel, rasps, sandpaper, rouge, or polishing powder or cream. Details:
1 – A sharp chisel starts getting out the chisel marks. Old school teachings are that the flat chisel, used gingerly, should provide almost the final surface.
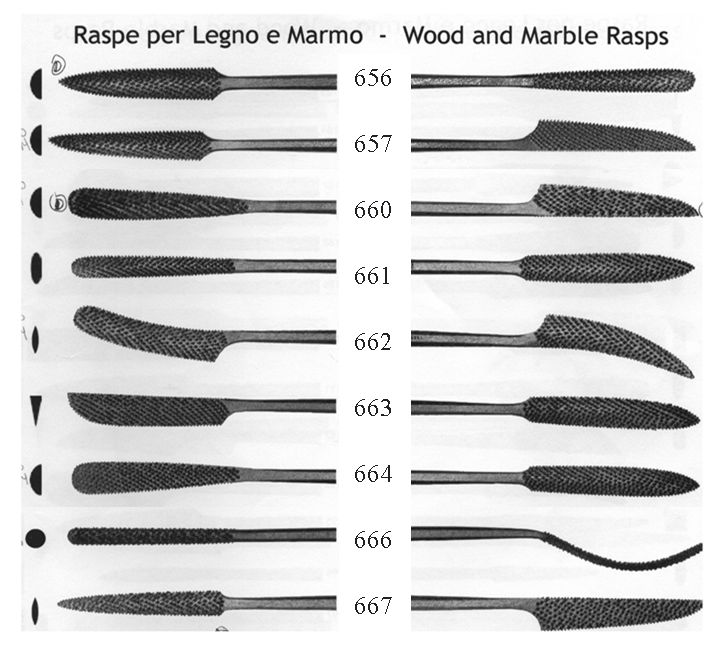
2 – The larger the rasp the coarser the teeth. Pick the shapes that get in most of the spaces on your piece. Most commonly we use point, spoon, and knife shapes but there are many options. Rasps need to be used in one direction; forward. Diamond rasps come in different grits and can be used in both directions. A good rasping job makes the next job much easier.
3 – Sandpaper must be made of silicon carbide (not aluminum oxide). It can be used wet or dry. Water increases speed and sandpaper longevity. You might start with 36 grit for marble or 60 grit for alabaster or limestone. A normal progression for sanding is something like 60, 80, 120, 220, 400, 600, 800, 1200, and 2000, if necessary. Of course, not all stones need to be sanded this high. Colorado marble might only be sanded to 220 grit; limestone to 600 grit; black marble to 2000 grit. Wash the piece between grits and then let it dry to see what you missed.
As a general practice, the first grit will take half the total sanding time. The next grit might take ¼ the total time. So by the time we get to the higher grits the time required is minimal. Note the inevitable frustration: as you go up the grits you will find deeper scratches that you missed earlier. You will need to go back to some steps. Expect this.
(Advanced: Diamond sponges and sanding rotary tools speed up this process. I use all these to get the job done.)
4 – Higher abrasives are in the form of powders, bars or creams. These are most commonly tin oxides. There are rouge bars that are used with a buffing wheel. (Make sure to use rouge for stone, not the metal stuff.) Powders are rubbed on the stone as are the creams. These options are basically 5000 to 8000-grit abrasives
5 – Chemicals are the last step – possibly. I think I am done but test it by wetting it down. Did it make a big difference? If yes maybe I should sand further with a higher grit. Another option would be to use a color enhancer. This is a diluted silicon solution that fills the microscopic scratches and keeps the surface looking wet.
6 – Wax protects the sculpture from fingerprints and other contaminants. I would not wax outdoor pieces as the wax will just burn off. There are other outdoor sealants that allow the stone to breathe.
Yeah, stone is heavy. Alabaster weighs 160 pounds per cubic foot and marble 170 pounds. Brute strength lifting is not wise: thought and cleverness rules here. Think of the ingenuity of the Egyptians or Mayans of erecting tall stone monuments.
1. Never lose gravity. If your stone is already off the ground, work vertically. That is use a board and rollers to get it to its destination. Do not lower it to the ground and have to pick it up again.
2. A stone can be walked on its corners. A 200 pounder can effectively become 60 pounds. Three steel pipes of 1.5” diameter can roll a very large block: two under and the third to replace the one coming off the back as it rolls. A pebble placed under a stone makes it easy to rotate.
3. An engine hoist is a relatively inexpensive lifting and moving devise. Wood planks might have to be placed under the small wheels to move it.

See this fun video where a guy moves giant stones via primitive methods:

by Ken Miduch
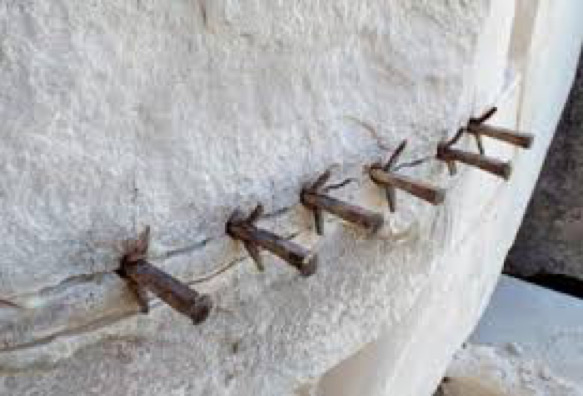
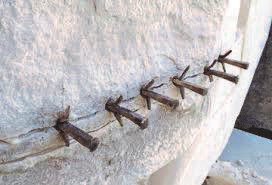
Ravinder from India once drilled a series of small holes in a 6’ deep block of marble. He inserted feathers and wedges in each hole and hammered a little on them each hour for a couple of days. Sure enough, the stone developed a crack through the 6’ resulting in 2 blocks.
In marble, determine the bedding plane or grain direction.
Drill the holes, insert the feathers and wedges, and hit them sequentially. Most times the stone will split quickly. If not, wait a few hours or overnight before proceeding to allow the crystals to line up.
Don’t. One wrong twist or extension can have long-term implications. I got impatient and reached over the edge of my trailer to lift the edge of a heavy stone just a little. Cantilevered at a 90-degree angle I did the worst thing and pulled my lower back. That took over a year to heal. (If this should happen, get on a flat surface and start stretching immediately to minimize the damage.)
Of course, always lift with your back straight and have your legs take most of the weight. But machines, even simple ones, make much sense. To move horizontally I pry the stone up a little with a pry bar and then insert two short 1-1.5” pipes so that I can roll the stone forward. I may have to lay a few boards on the floor or grass so the pipes will roll but I will slowly get to my destination.
You can lift a stone with a portable engine hoist (around $200). You can also tilt a stone forward and put a 2×4” block under it. Then lift the other side and put a block under that side. Now lift the opposite side and insert a second block of wood. Keep repeating this process until you reach the desired height. See this interesting Youtube of a guy building his own Stonehenge with any power tools: https://www.youtube.com/watch?v=-K7q20VzwVs
Remember never lose height. If a stone is already up in the air, like on a pickup bed or car trunk, do not throw it on the ground to be lifted anew onto a stand. Do everything you can to avoid having to lift it a second time.
Sometimes we need to secure a small crack, a micro-fissure, in a stone. Most often a few drops of super glue (Cyanoacrylate) will hold it until you finish working the area. I use the inexpensive stuff but for tight cracks, you might consider the really liquid versions of these better ones: Starbond, Zap, or Jet. They now make gel super glues for slightly wider openings.
In alabaster, this might be all you need to do. However, on marble, this type of glue may not be a permanent fix. Further, this doesn’t work well when you are gluing two pieces together. Epoxy, which is a two-part glue, is much stronger. Again you can use the inexpensive type from the hardware store. There is a more liquid type called penetrating epoxy (Tenax, Wood and Glue, and others). I do prefer the slower curing time ones – 20 minutes versus 5 minutes – to let me position components best.
Final note: If you are gluing two pieces together you may think all is well. However, it is possible that the pieces will break again along the very next row of crystals. Therefore, even though it is kind of a pain, it is best to put a small pin between the pieces which are to be reunited. This might just be a short ¼” stainless rod (or bolt with the head cut off) and then gluing the pieces with the epoxy.
You must use silicon carbide sandpaper (or diamond sheets or pads). The grains of aluminum oxide paper quickly round out and stop cutting.
I use the first two grits of sandpaper dry and the rest wet. I wash off the stone between grits and allow it to dry for inspection before continuing. I then use a crayon to note the place I missed and continue. You can use an old sheet of 1000-grit sandpaper for a few minutes between grits to bring out missed scratches. Tongue depressors, ice cream sticks, small flap wheels, cone-shaped tapers, and silicon carbide rubbing sticks all aid in getting into tight places. Silicon rubbing “blocks” are flat surface chunks which, when used wet by hand, can get the bumps out of a surface. (Bumps are often felt while not seen.)
Half your sanding time is on the first grit—getting out those deep scratches. Then the next grit might be 1/4 your time and so on. The last grit is a “breeze.” Scratches hold light. Get them out and the stone glistens.


A base is like a frame. It accentuates the sculpture. It is important to select a base that is not too busy or large for the sculpture. You don’t want to take attention away from your masterpiece. You want to have a stable base but sometimes it looks best if the sculpture overhangs its support. On the other hand, the “footprint” of the sculpture should be at least and generally not much more than 1-1.5″ from the edges of the base. As a very general rule, the height of the base should not be more than 1/3 the height of the sculpture. The base can be granite, irregular stones, steel, plexiglass wood (I like ebony stained walnut), etc.
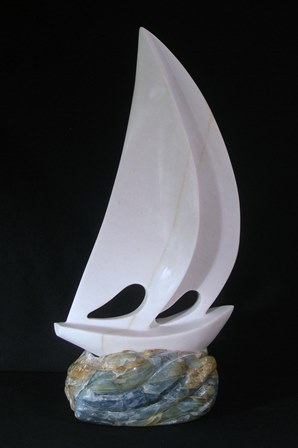
©2015 Ken Miduch
This is an art, not a science, so each case is different.
©2015 E. Woodbury
Here is the detail methodology of “basing”:
• Get a flat and level surface to work upon
• Determine sculpture position; secure and hold it
• Mark bottom level line
• Cut bottom; check for flatness (might use a tile)
• On larger bases, cut out center of the bottom to make flattening easier
• Determine hole location in sculpture bottom (find center with a pebble)
• Drill hole with hammer or core drill (consider the bedding plane)
• Determine hole in base: mark sculpture footprint on the base or cut out a template (cardboard or masonite); mark “up”
• Drill base
• Decide on pins: stainless steel or turning pin: gluing one or both sides or using threaded connectors. Consider the ultimate weight of the piece.
• Put non-scratch feet base or adjustable feet on larger pedestal
• Proudly display sculpture